Prototype Development – A Step-by-Step Guide

Overview

Prototype development isn’t just another step—it’s the backbone of transforming ideas into tangible products. In this article, drawing on 15 years of hands-on experience prototyping hundreds of products, we delve into key stages of product development, from initial preparation to manufacturing. Learn how to navigate common pitfalls, from overly complex designs to overlooking user feedback, and gain practical insights into various prototype types, illustrated through real-life case studies. Whether you’re a seasoned pro or new to product development, the knowledge shared here is essential for refining designs and bringing innovative products to market.

What is Prototype Development?

Prototyping is a critical aspect of the product development lifecycle that enables designers and developers to test their ideas and concepts before investing significant resources in manufacturing a finished product. One of the key advantages of prototyping is that it enables early identification of issues and user needs, leading to cost reduction and risk mitigation. By validating the design and functionality of the prototype, developers can avoid costly post-development changes and ensure that the final product meets user expectations. Additionally, prototyping enhances the user experience by collecting direct feedback from target users, allowing developers to make informed improvements to usability and user satisfaction. Furthermore, prototyping facilitates funding and stakeholder buy-in by providing a tangible version of the product concept to potential investors and stakeholders. This approach showcases the project’s viability and potential for success, making it easier to secure funding and support. Overall, prototype development is crucial in ensuring that the final product is of high quality, meets user needs, and is financially viable. In this article, we will delve into the various stages and strategies of prototyping to help you understand the importance of prototyping in the product development process.

prototyping a product

Why is Prototype Development important?

Prototype development plays a crucial role in product design and innovation for several reasons:

  1. Early Identification and Cost Reduction: By creating a prototype, teams can test and validate the design and functionality of a product early in the development process. This allows for the detection of design flaws or functional misalignments with user needs before the product goes into mass production. Addressing these issues during the prototyping stage is significantly less expensive than making changes after the product has been manufactured. As a result, prototyping reduces overall financial and market risks associated with new product development.
  2. Enhances User Experience: Prototypes enable developers to gather direct feedback from their target audience. This feedback is invaluable as it informs improvements in usability and functionality, ensuring that the final product is user-friendly and meets or even exceeds customer expectations. By refining the product based on user input, companies can enhance customer satisfaction and increase the likelihood of a product’s success in the market.
  3. Facilitates Funding and Stakeholder Buy-In: Having a physical prototype makes it easier to communicate the product concept to potential investors and stakeholders. It serves as a proof of concept, demonstrating the feasibility and potential of the product, which can help secure the necessary funding and support for further development. A tangible prototype also allows stakeholders to see, touch, and feel the product, making it easier for them to envision the finished product and its market potential.

In summary, prototype development is essential because it provides a practical, cost-effective way to test and refine product concepts, improves user engagement and satisfaction, and aids in securing financial and organisational support.

How to Develop a Prototype

Developing a product can be an exciting process, but it can also be challenging and time-consuming. Creating a prototype is a crucial step in the product development process that can help you test your ideas and refine your product before investing significant resources in manufacturing a finished product.

Here is an overview of where prototyping fits into the design process and therefore how you can go about developing a prototype:

  1. Identify the problem and define the product idea: The first step in developing a product is to identify a problem or need that your product can solve. Once you have a product idea, define it clearly, and determine its unique selling proposition. Depending on the idea, a quick lash up prototype of the idea may help validate the idea.
  2. Conduct market research: Conducting market research is essential to determine whether your product idea is viable and meets the needs of your target audience. This step can also help you identify any potential challenges and competitors.
  3. Develop a concept: Create a concept for your product, including the design, features, and functionality.
  4. Create a 2D or 3D design: Develop a 2D or 3D design of your product using computer-aided design (CAD) software or creating sketches and models by hand.
  5. Build a prototype: Use your design to create a prototype. This can be done using various materials, including foam, plastic, or metal. You can also use 3D printing technology to create a prototype.
  6. Test and refine the prototype: Test the prototype to identify any issues or areas for improvement. Refine the design and functionality based on the feedback received from users and stakeholders.
  7. Iterate the prototype: Create multiple iterations of the prototype until you have a final version that meets your requirements and is ready for manufacturing.

Overall, developing a product requires careful planning, research, and attention to detail. By following these steps and developing a prototype, you can ensure that your product meets the needs of your target audience and is ready for manufacturing.

Prototype Development Process

Step 1: Preparation before prototyping

CAD model Before diving into the prototyping phase, it’s crucial to prepare adequately to ensure that the product development process runs smoothly and efficiently. In this section, we will discuss the essential steps to take before prototyping to minimise risks and maximise the chances of success.

The first critical step is to validate the product concept. Before investing significant resources in developing a prototype, it’s essential to ensure that the product idea is viable and meets the needs of your target audience. Conducting market research, collecting feedback from potential users, and testing the concept can help validate the product idea and reduce the risk of failure in later stages.

Another crucial step is to conduct a patent search to ensure that the product does not infringe on any existing patents. This process can help reduce legal risks and prevent costly legal battles down the line.

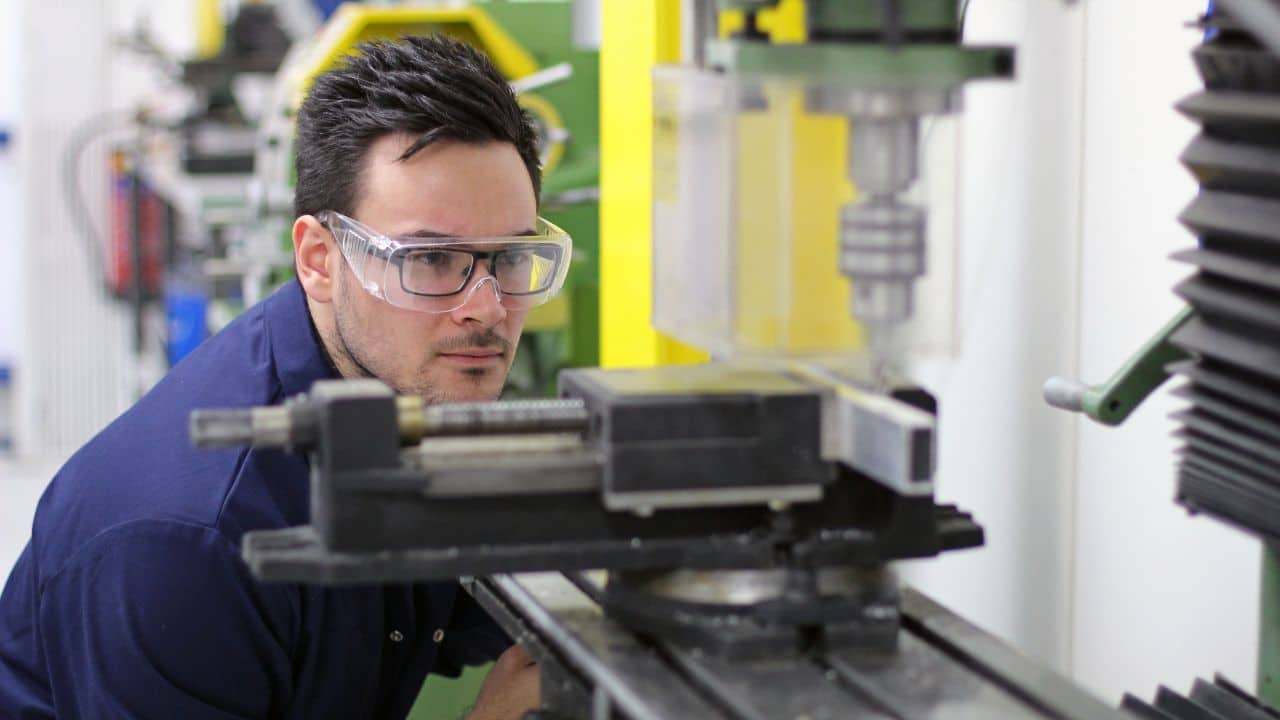
In addition, it’s essential to get the product design developed as far as possible with 3D CAD models. This approach can help reduce costs by identifying potential design flaws and functionality issues before investing in physical prototypes. With 3D CAD models, designers can simulate the product’s performance, test different materials and designs, and make informed decisions before moving forward with the prototyping phase.

Adequate preparation before prototyping can help reduce risks, improve efficiency, and increase the chances of success in the product development process.

Step 2: The Importance of Clarifying Prototype Objectives

One of the most critical aspects of successful prototyping is establishing clear goals for each iteration. It is essential to define what aspects of the prototype will be tested and how feedback will be integrated into future iterations. This helps ensure that the prototypes are developed in a structured and purposeful manner, with the ultimate goal of achieving the desired outcomes. Without clear objectives, the prototypes may not be effective in addressing the intended needs or identifying the necessary improvements. Therefore, it is crucial to stress the importance of clarifying the prototype objectives to achieve the desired results and ensure that the development process remains on track. By doing so, teams can build prototypes that meet the needs of their users, get valuable feedback, and make design changes towards the best possible solution.

Step 3: Understanding the Importance of Proof of Principle Prototyping

Proof of principle prototyping is critical to the success of any product development effort. By validating the core functionalities and ergonomics early on, teams can ensure that their concept is both feasible and viable. This type of prototype serves as a crucial tool for identifying any potential issues or limitations that need to be addressed before moving forward with detailed design.

Depending on the product idea, there are different methods that can be used for proof of principle prototyping. It may be a basic physical model that is rough and ready, but it proves the functionality, or it may be a foam model proving the ergonomics and size.

One of the key benefits of proof of principle prototyping is that it helps to minimise the risk of costly design changes later in the development process. By identifying any technical challenges early on, teams can make necessary changes and adjustments to ensure that their product meets the intended requirements. Moreover, this type of prototyping can also help to identify opportunities for innovation or improvement that may have been overlooked in the initial concept phase.

Step 4: Creating the Mark 1 Prototype

The journey from initial concept sketches to the creation of the Mark 1 Prototype is an essential step in product development. It involves translating the product concept into a tangible object that can be tested and evaluated. The Mark 1 Prototype serves as a crucial tool for design validation and user experience testing, allowing teams to identify any potential issues and make necessary adjustments before moving forward with detailed design.

Starting with initial concept sketches, the team begins to evolve the design, refining it based on feedback and testing. As the design takes shape, the team will create 3D CAD models and mock-ups to evaluate the product’s form and function. This process helps to identify any potential issues with usability, ergonomics, or aesthetics, and allows the team to refine the design accordingly.

Once the design has been finalised, the team will move on to creating the Mark 1 Prototype. This prototype is typically the first fully functional version of the product, allowing the team to test the product’s core functionalities and user experience. This is an important step in the development process, as it helps to validate the product concept and ensure that it meets the intended requirements before progressing to the next stage.

During the development of the Mark 1 Prototype, teams will conduct user testing and gather feedback to identify any potential issues or areas for improvement. This feedback is then used to make necessary changes and adjustments to the design, ensuring that the final product meets the needs of its intended users

Step 5: Iterative Design and Refinement through Further Prototyping

Iterative prototyping It is very common to go through multiple rounds of prototyping to the finalise the design ready for production. Each iteration will solve different problems from functionality, ergonomics, size, weight, manufacturing and assembly. It may be that the production cost is too high and functionality needs to be removed or different manufacturing methods need to be considered. The process typically involves making incremental changes to the prototype, testing it, and then repeating the cycle until the desired level of refinement is achieved.

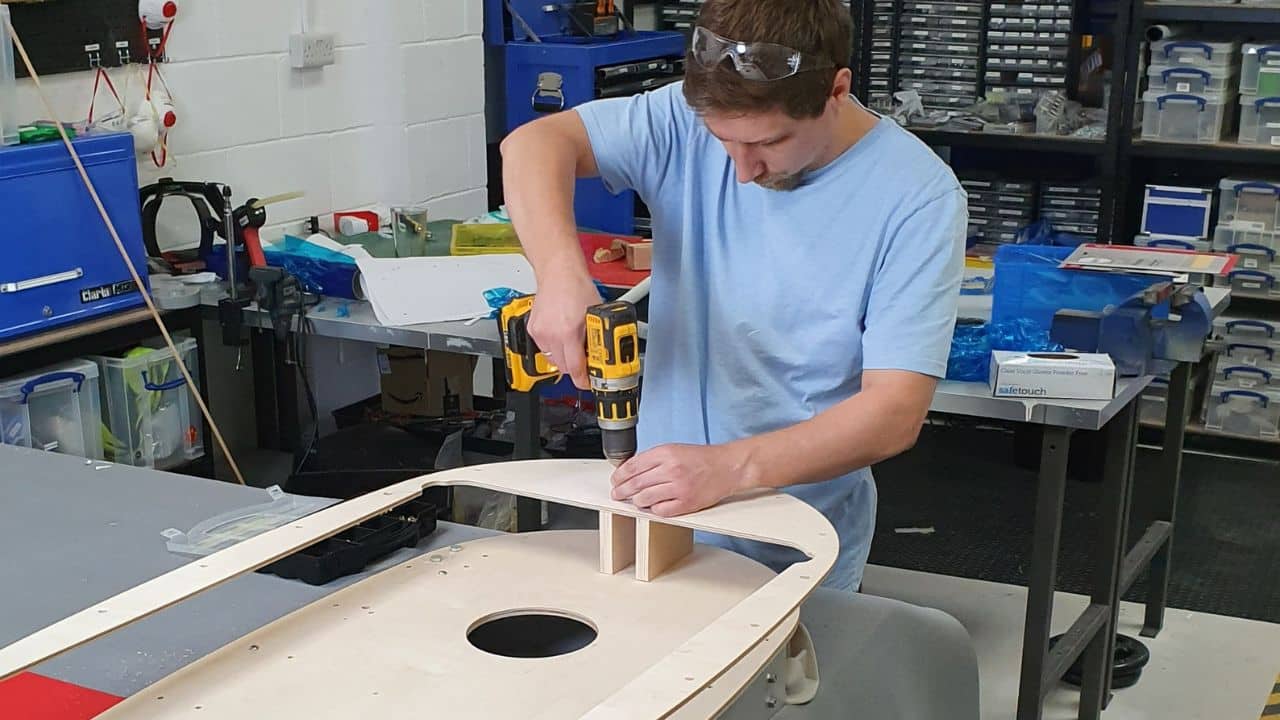
During the refinement process, it’s essential to track and document all changes made to the prototype, including the reasons behind each change. This helps to ensure that the team is on the same page and that the design is heading in the right direction. Additionally, it’s important to involve stakeholders and users in the process to ensure that their needs are being met and that the final design will be well-received.

Overall, the iterative nature of design improvements allows for a more refined and effective final product. By incorporating feedback and making incremental changes, designers can create a prototype that meets the needs of users and stakeholders while remaining true to the project’s goals and objectives.

Step 6: Enhancing Product Appeal with Styling and Branding

Branding and aesthetic design are crucial step that need to be considered when creating a product prototype. Depending on the product, styling may have been a big part of the design from the start, however for some products it is critical to focus on the functionality and then refine the style later. As the design evolves it is important to incorporate the branding and aesthetic elements to align with the market expectations. This helps in creating a cohesive and visually appealing product that resonates with the target audience.

During the prototyping stage, designers experiment with different design elements such as style, material, colours and textures to create a unique and memorable brand identity. They also consider the product’s intended use and its target audience when making design decisions. This ensures that the product meets the market’s expectations in terms of aesthetics, usability, and functionality.

Overall, incorporating branding and aesthetic considerations into later prototyping stages is essential to the success of any product. By doing so, designers can create a product that not only fulfils its intended purpose but also appeals to the target market.

Step 7: Importance of a Prototype in Product Development

Transitioning to more sophisticated prototypes based on accumulated design insights and feedback is a fundamental step in preparing for the move toward manufacturing readiness. By constantly refining and improving the design based on feedback and insights gained during the prototyping phase, you can ensure that the final product is of the highest quality and meets all the necessary requirements. As the prototypes become more sophisticated, it becomes easier to identify potential issues and address them before moving on to manufacturing. This helps to minimise the risk of costly mistakes and delays down the line. Ultimately, the goal is to create a product that is not only functional and effective but also aesthetically pleasing and easy to use.

Step 8: Navigating the Path to Manufacturing

The Art of product manufacturing To transition from a refined prototype to the manufacturing phase, there are several important steps to consider. Here are some key factors to keep in mind:

  1. Evaluate the cost: Before moving forward with production, it’s important to assess the cost of manufacturing the product. This includes materials, labour, and any other associated costs. The goal is to ensure that the product can be manufactured at a reasonable cost while still maintaining quality.
  2. Optimise production efficiency: Once the cost has been evaluated, it’s important to optimise production efficiency. This includes streamlining processes, minimising waste, and reducing production time. By doing so, you can increase productivity and reduce costs.
  3. Test and refine: Before launching the product, it’s important to thoroughly test and refine it. This includes testing for quality assurance, durability, and functionality. Depending on the product, there may be regulations that the product must meet which require testing set out within the standard. Any necessary changes should be made during this stage to ensure that the product meets the required standards. It is worth noting at this stage that it is not always possible to run regulation testing on prototypes as they are not the final product and may not be strong enough, therefore the testing will have to be finalised using production parts.
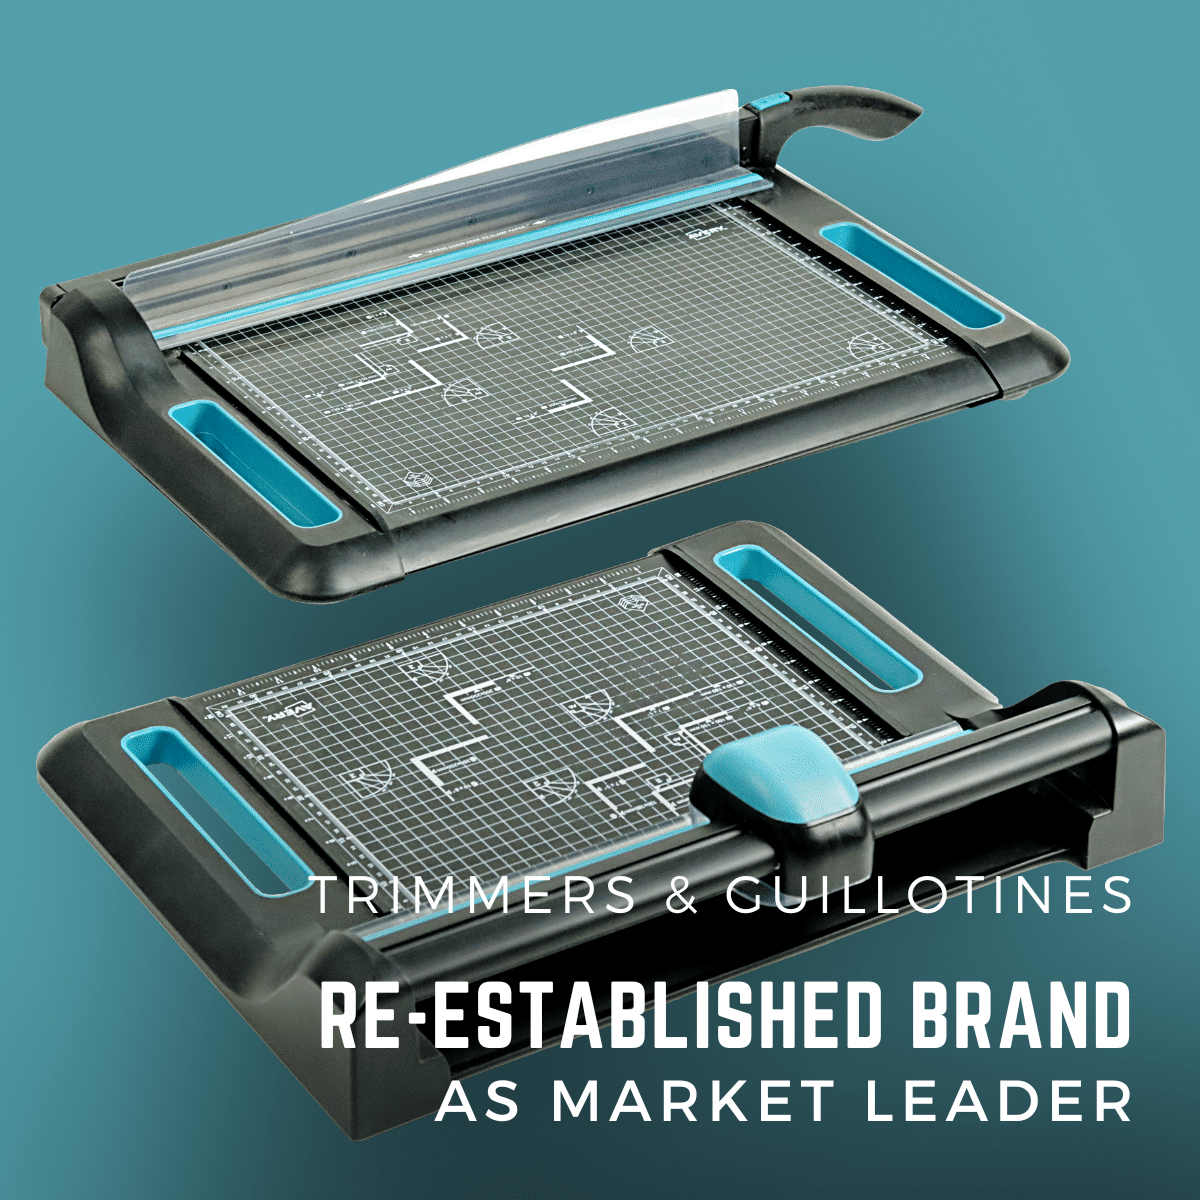
  4. Prepare for market launch: Once the product has been tested and refined, it’s time to prepare for market launch. This includes developing a marketing strategy, determining pricing, and identifying potential sales channels. It’s important to have a clear understanding of the target market and how to effectively reach them.

By following these steps, you can successfully transition from a refined prototype to the manufacturing phase while considering cost, production efficiency, and market readiness.

Some of the projects we've worked on

Common Mistakes When Prototyping

Overcomplicating the design is a common mistake that can occur during the prototyping process. While it’s essential to incorporate all the necessary features and functionality, adding too many elements can make the product difficult to use and increase prototyping costs. When designing a prototype, it’s crucial to maintain a balance between functionality and simplicity. Adding too many features can lead to confusion and frustration among users, which can ultimately harm the product’s success.

Another common mistake is neglecting user feedback. Prototyping is all about testing and refining the product based on user feedback, so it’s crucial to gather and incorporate feedback throughout the process. User feedback can provide invaluable insights into how the product is being used, what features are working well, and what needs improvement. Neglecting user feedback can lead to a product that fails to meet the needs and expectations of its intended audience.

Finally, failing to accurately simulate real-world use conditions can lead to significant issues down the line. It’s essential to test the prototype in realistic environments and situations to identify any potential problems before moving on to manufacturing. This can include testing the product with different types of people, in different scenarios. Testing in realistic conditions can help identify issues that may not have been apparent during the design and development process.

In summary, the prototyping process requires careful consideration of functionality, user feedback, and real-world testing conditions. By avoiding the common pitfalls of overcomplicating the design, neglecting user feedback, and failing to simulate real-world use conditions, you can ensure that your product is successful in meeting the needs and expectations of its intended audience.

Types of Prototypes

When it comes to product development, introducing different types of prototypes is essential to validate ideas and ensure that the final product meets user needs and expectations.

Different prototypes can be created with different intentions. They may be intended to be visual, in which case early prototyping methods such as foam or clay modelling may be used to test the aesthetics and ergonomics. As the design progresses closer to being production ready, 3D printing methods can be used that are finished to a level that the prototype represents the final product in appearance.

Functional prototypes (basic physical modela) can be used to test mechanisms and strength, but they may be rough, bulky and very much look like a prototype. But these are invaluable for proving the functionality before refining the design to the final prototype.

Designers will then have the challenge of bringing the two together into an aesthetically pleasing product that functions as required. 3D printing methods can be used to test and refine the design before costly manufacturing methods are used. These prototypes can be used as interactive prototypes for gathering user feedback.

Knowing when and why to use each type of prototype is crucial for creating a successful product. Visual prototypes are ideal for early feedback and validation, functional prototypes are useful for testing and refining functionality, and interactive prototypes are essential for testing usability and user experience. By utilising each type of prototype appropriately, product development teams can ensure that the final product meets user needs and expectations.

Different Fidelity Prototypes

The concept of fidelity in prototyping refers to the level of detail and realism that a prototype possesses. Prototypes can be classified as low-fidelity or high-fidelity depending on the level of detail and realism they aim to simulate.

Low-fidelity prototypes are simple, rough, and usually quick to create. They are used to test early ideas and explore design concepts. These are not necessarily aesthetically pleasing but focus more on testing the functionality of the product. You can learn so much using cheap materials and methods to prove the design direction before using more costly methods such as 3D printing.

Another low-fidelity prototyping option is using foam, cardboard or clay to create a more aesthetic prototype that can be used for testing ergonomics. This can help determine the correct size, allowing the designer to understand what space is available internally to fit any internal components.

Once you have proven your design using early prototyping techniques you can then move to more high-fidelity prototypes using sophisticated 3D printing techniques. For this you will need 3D CAD. Again, there are different levels of prototypes that can be made and there are many different 3D printing methods available. Initial rapid prototypes may be small assemblies to test certain functionalities. These may use less accurate, cheaper methods such as FFF/FDM. For more accurate, advanced assemblies, methods such as SLS/SLA or 3D machining will be used. There are many different materials that can be used to achieve results closer to production ready. These parts can be finished in the correct colour to achieve the desired aesthetic results. 3D printing technologies continue to advance and new materials are being developed.

The distinction between low-fidelity and high-fidelity prototypes is important because each type of prototype serves a different purpose. Low-fidelity prototypes are used early in the design process to quickly explore and validate ideas. They are often cheaper but focus on testing a certain element of the design rather than the whole experience. While high-fidelity prototypes are used later in the design process to simulate more advanced interactions and user experiences and are often more expensive to achieve results closer to production ready.

Prototype manufacturing at D2M

Equerry

Equerry is a device equipped with an inbuilt motor and a polish sachet, designed to offer a convenient shoe polishing solution. Although it’s a relatively simple product, it serves as an informative case study because it required various types of prototypes during its development process. Initially, we created basic test-rig prototypes featuring different motors and gearboxes attached to wooden blocks, with off-the-shelf shoe brushes glued to the ends. These rudimentary prototypes helped us determine the necessary torque and speed for effective shoe polishing. Armed with this data, our design team was able to specify the appropriate battery size and design the product around the chosen motor and battery, ensuring that these critical components worked seamlessly.

This process boosted our confidence before we committed to detailed CAD development and the production of the MK1 prototype. While the MK1 didn’t showcase the final textures, colors, or materials, it was crucial for proving the fit of all components within the selected casing design. It also allowed us to test the ergonomics and gather initial usability feedback, paving the way for the higher-fidelity MK2 prototype. This more costly version closely represented the final product, using the intended materials, colors, and finishes—looking 98% like the final product. We used it to develop early marketing materials, gather feedback on wholesale pricing, and create a crowdfunding video.

Following successful funding through Kickstarter, we developed a final pre-production prototype incorporating all the manufacturer’s suggested changes for value engineering in mass production. This prototype didn’t need to replicate the final product’s appearance and was used internally to ensure that the modifications did not result in any unintended consequences. With hundreds of pre-orders and the pre-production prototype affirming the final design, the client was confident enough to move forward with the tooling and production of the first batch of units.

How D2M can help with Prototype Development

At D2M, we understand that prototyping is a crucial part of the product development process. With our extensive experience and knowledge in prototyping, we can help you bring your product ideas to life and refine them to perfection.

We offer a range of prototyping services that cater to your specific needs, including 3D printing, CNC machining, injection moulding, and manual fabrication. We use the latest techniques and technologies to create working prototypes that help refine your product design and identify any potential issues before moving on to mass production.

Our team at D2M includes some of the UK’s most talented and innovative product and soft goods designers. We bring creativity, expertise, and knowledge to every project we work on, ensuring that your product stands out from the competition.

For every new project, we develop a bespoke proposal outlining the entire product development journey, stage by stage. We put you in control of the process, your intellectual property, and your level of investment, ensuring complete transparency throughout the process.

We have developed hundreds of products across a wide range of industry sectors, including mother & baby, sport, therapy, kitchenware, and pets, to name just a few. Our team has a deep understanding of the prototyping process and can help you navigate through the different stages of prototyping to ensure that your product is successful.

accessories prototyping

Prototype Development FAQs

What is prototyping development?

Prototyping development is an iterative process of creating a working model of a product before it is produced in large quantities. The goal is to test and refine the product, identify any issues or improvements needed, and gather feedback from users before moving on to manufacturing.

The stages of prototype development typically include ideation, design, prototyping, testing, and refinement. These stages may overlap and iterate multiple times to ensure the product meets the desired specifications and user needs.

A prototype in product development is a working model of a product that is used to test and refine the design before mass production. It can be made using various materials and techniques and may be functional or non-functional.

The prototype development technique involves creating a working model of a product to test and refine the design before mass production. Various techniques can be used, including 3D printing, CNC machining, injection moulding, or manual fabrication.

The purpose of prototype development is to create a working model of a product to test and refine the design before mass production. This helps identify any issues or improvements needed, gather feedback from users, and ensure the final product meets the desired specifications and user needs.

Conclusion

In conclusion, prototype development is a critical phase in the product development lifecycle, offering numerous benefits such as early issue identification, cost reduction, and enhanced user experience. By validating designs and functionalities early on, developers can mitigate risks and ensure the final product meets user expectations. Moreover, prototypes facilitate funding and stakeholder buy-in by providing tangible proof of concept. Understanding the importance of prototyping and navigating the process effectively can significantly increase the chances of success in bringing a product to market.

On this page
Start your journey with D2M today
From idea

to successful

product

All the resources you will need:

Bonus 40min extended case-study video!